How To Take A Screenshot On A Dell PC: 4 Easy Ways
In today's digital age, taking screenshots has become essential. It is a tool for communication, learning, and problem-solving. Screenshots allow us to capture and share information quickly. This helps us provide a visual reference that enables others to understand what we're talking about.

Much like our other article about taking screenshots on an Asus PC, we will guide you on how to take a screenshot on a Dell PC or laptop.
Throughout this article, we'll explore the different methods of taking screenshots. We'll also cover the various keyboard shortcuts and software options available.
How to take a screenshot on a Dell PC or Laptop
There are three main ways to take a screenshot on a Dell PC or laptop:
- Third-party screenshot tool. One option is ScreenRec, which is free, and offers both screen recording and screenshotting capabilities. It also allows you to annotate and instantly share your screenshot because it uploads it to your private cloud account.
- Using the Windows + Print Screen shortcut. This is a built-in feature that is quick and easy to use. Unfortunately, you can only take full-screen screenshots with this option.
- Using the Snipping Tool. Also a built-in feature. It’s got limited annotation features and no sharing capabilities.
- Third-party screenshot tool. One option is ScreenRec, which is free, and offers both screen recording and screenshotting capabilities. It also allows you to annotate and instantly share your screenshot because it uploads it to your private cloud account.
Third-Party Screenshot Tool: ScreenRec
ScreenRec is a free screen recording and screenshotting tool that is available for Windows, Mac, and Linux. So, if you want to know how to take a screenshot on a Dell PC on Windows 10, this is the most versatile option.
ScreenRec is a popular choice for users who need to capture and share screenshots quickly.
Overview Of ScreenRec
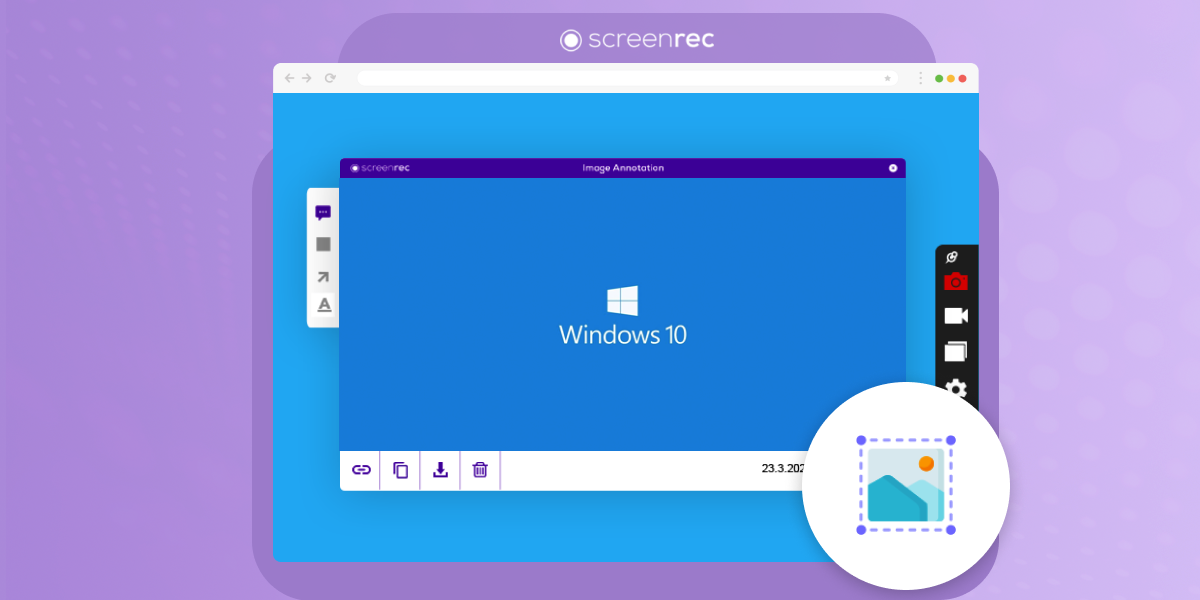
With ScreenRec, you can easily capture screenshots of your entire screen, a specific window, or a selected region. The tool also offers the essential annotation features like shapes, arrows, comments, and text.
ScreenRec also comes with free cloud storage for easy sharing. It instantly uploads your screenshots to your account and gives you a private shareable link. The simple user interface makes it easy to navigate and use.
How To Take A Screenshot
To take a screenshot using ScreenRec, simply follow these steps:
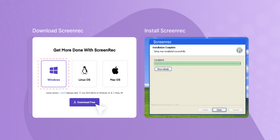
Download and install ScreenRec.

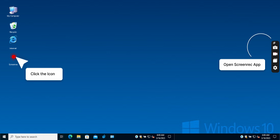
Launch the ScreenRec app on your computer.
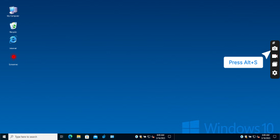
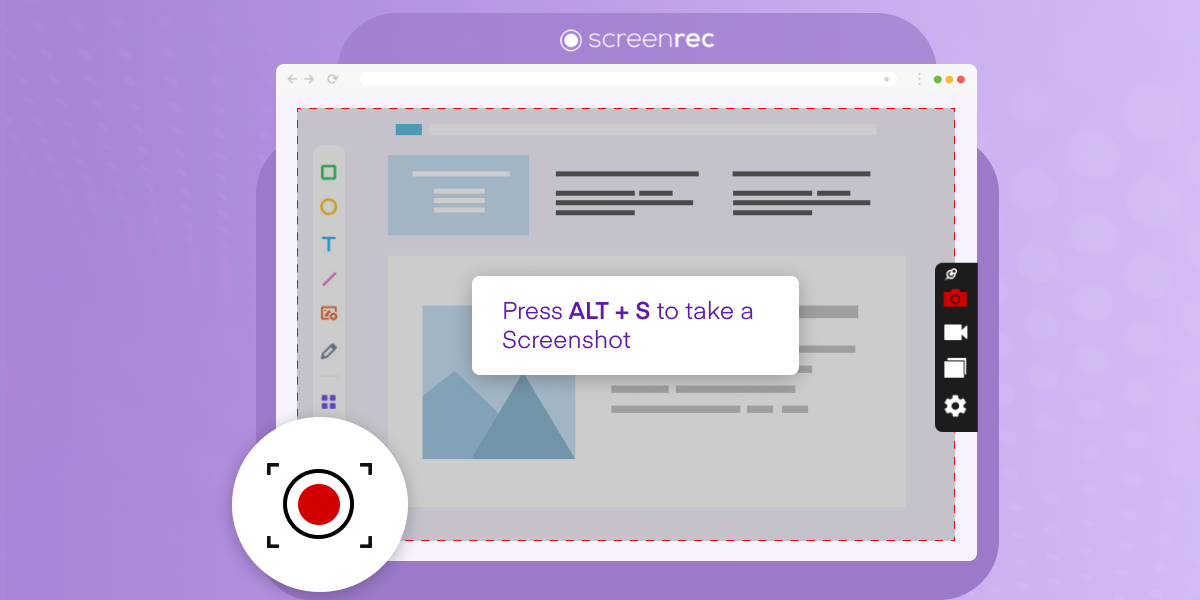
Press Alt + S or the Photo Camera button in the ScreenRec menu.
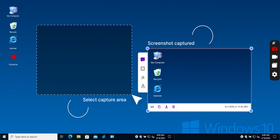
Drag your mouse to take a screenshot. You can capture a screenshot of your entire screen, a specific window, or a selected region.
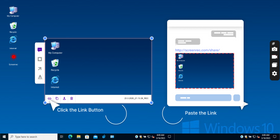
The screenshot it automatically saved to your ScreenRec account. If you want to send the screenshot, click the Link button to create a private sharing link and copy it to your clipboard. Alternatively, click the Copy button to copy the image itself to your clipboard.
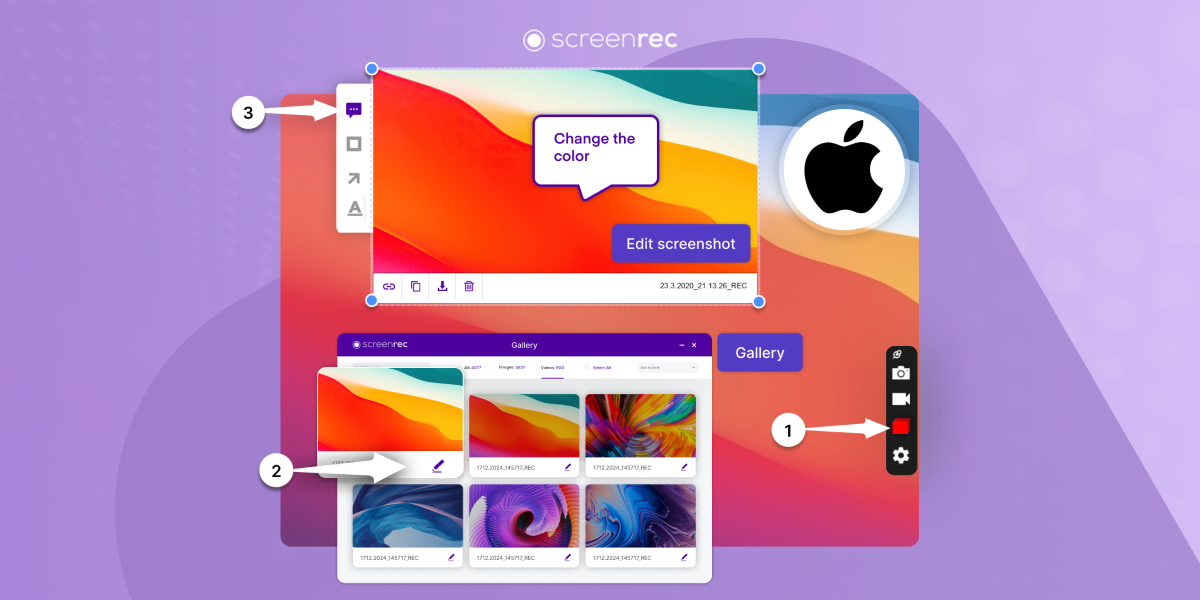
How To Edit And Annotate The Screenshot
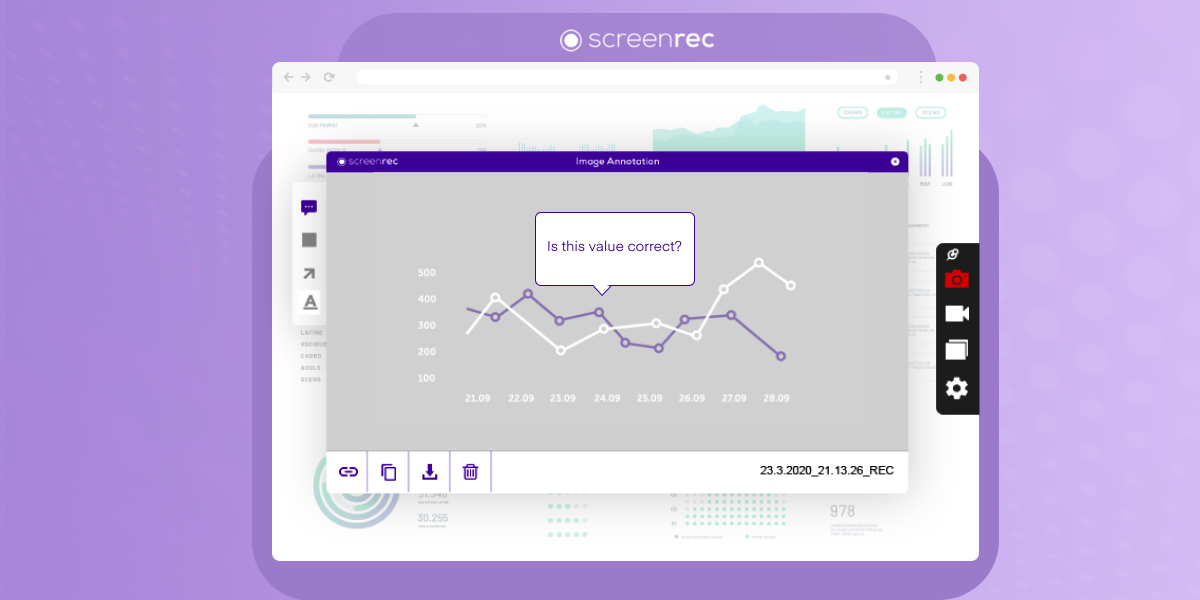
When you capture a screenshot, you will see ScreenRec’s annotation tools. Use them to add notes, arrows, or other markings to your screenshot if desired. When you are done, simply click the Link button to copy your unique sharing link or click the Copy button to copy the image to your clipboard.
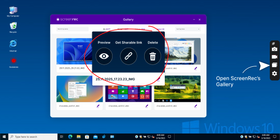
If you want to edit a screenshot you’ve taken previously, open ScreenRec’s Gallery, find the screenshot, and click the View icon. You will again see the annotation tools. Follow the instructions in the previous paragraph.

How To Save The Saved Screenshot
By default, ScreenRec does not save the screenshot on your Dell computer. If you want to save the screenshot on your computer, click the Save button at the bottom. Th is will save it to your folder of choice. You can then specify which folder you want to save the screenshot to.
How To Find The Saved Screenshot
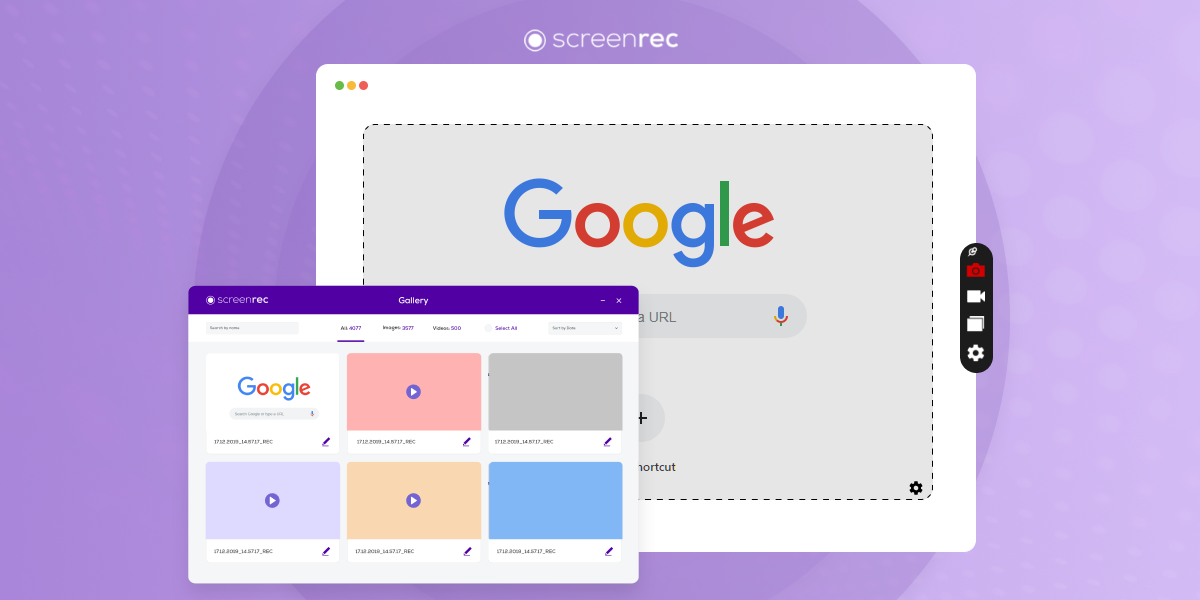
You can also find the screenshot in your Gallery from the ScreenRec menu. Hover over the screenshot, click the View button, and you will be able to get the shareable link or download the image to your Dell laptop.
2. Windows + Print Screen shortcut
When it comes to how to take a screenshot on a Dell laptop on Windows 10, the Windows + Print Screen keyboard shortcut is a quick and easy way.
Explanation of the Keyboard Shortcut
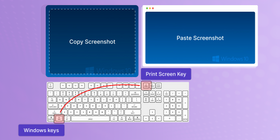
To use the Windows + Print Screen shortcut, simply press the Windows key and the Print Screen key on your laptop or computer at the same time.
The Print Screen key is usually abbreviated as "PrtScn" or "PrtSc" and is located near the top right corner of the keyboard. But it can be different on different laptop models.
On some keyboards, you may need to press the "Fn" key along with the Print Screen key to activate the shortcut.
Once you have pressed the Windows + Print Screen keys, your screen will briefly dim to indicate that the screenshot has been captured.
How to Find the Saved Screenshot
The captured screenshot will be saved automatically to your computer's Pictures folder.
To find the saved screenshot, open File Explorer and navigate to your Pictures folder. The captured screenshot will be saved in a subfolder called “Screenshots” as a PNG file with a name in the format "Screenshot (X).png'. Where "X" is a number representing the order in which the screenshot was taken.
If you are unable to locate the saved screenshot, you can also search for it using the Windows Search function. Simply type "Screenshot" in the search bar and the cap tured screenshot should appear in the search results.
3. Snipping Tool
The Snipping Tool is a built-in Windows utility that allows users to capture screenshots of their computer screen. So, it doesn't matter if you don’t know how to scre enshot on desktop. If you’re screenshotting on a Dell Windows 10 laptop or PC, this is a handy tool for capturing screenshots of specific areas on the screen or even entire windows.
Overview
The Snipping Tool is a screenshot capture tool that comes pre-installed on most versions of Windows. It allows you to capture various types of screenshots. You can do a free-form snip, which is exactly what it sounds like — mark the area by pressing down your mouse’s left button and moving it around the area you want to capture.
You can also capture a full-screen snip, which is also what it sounds like. Finally, you can capture a single window of an active app.
The Snipping Tool also provides a couple of simple editing tools you can use to mark up and annotate the captured screenshots.
How To Take A Screenshot
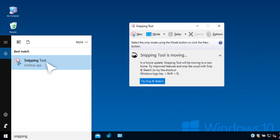
Search: Open the Start menu and type "Snipping Tool" in the search bar. Click on the application to launch it.
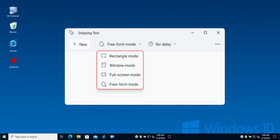
Choose snipping mode: Select the desired capture mode from the top toolbar:
- Rectangle mode: Capture a specific rectangular area.
- Free-form mode: Draw a freehand shape around the desired area.
- Window mode: Capture the entire active window.
- Full-screen mode: Capture the entire screen.
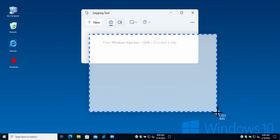
Capture the screen: Click and hold the mouse button, then drag to select the desired area. Release the button to capture the selection.
How To Edit The Screenshot
After capturing, the Snipping Tool window will display the screenshot. Use the tools on the toolbar to add annotations:
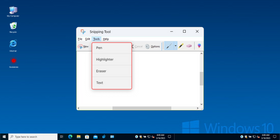
- Pen: Draw freehand lines or shapes.
- Highlighter: Highlight specific areas.
- Eraser: Remove unwanted marks.
- Text: Add text annotations.
How To Save The Screenshot
After capturing the screenshot, the Snipping Tool will open a new window with the captured image. You can use the editing tools to annotate or mark up the screenshot as needed. Once you are satisfied with the screenshot, click on the "File" menu and select "Save As" to save the screenshot to your desired location.
Alternatively, you can use the "Share" button to save the annotated screenshot to a desired location or share it directly through email, messaging apps, etc.
How To Find The Screenshot
By default, screenshots taken with the Snipping Tool are saved in the "Pictures" folder within a subfolder named "Screenshots." You can access this folder by opening File Explorer and navigating to the designated location.
4. Snip & Sketch
Briefly available as a Dell screenshot tool on Windows 10, the Snip & Sketch tool is being phased out in favor of the Snipping Tool on Windows 11. Still, if you want to use that, you can do it.
Overview
Introduced in Windows 10, Snip & Sketch combines the functionalities of Snipping Tool with basic editing capabilities. It offers similar capture modes like rectangular, freehand, window, and full-screen snips.
The tool also provides additional editing tools like cropping, resizing, rotating, and adding notes with different pen styles and colors. It allows saving screenshots in various formats (PNG, JPG, GIF) and sharing directly through email or social media.
How To Take A Screenshot

- Press Windows Key + Shift + S.
- Choose the desired capture mode from the pop-up menu.
- Click, hold, and drag to select the area.
- Release the button to capture the selection.
How To Annotate Your Screenshot
- The captured screenshot opens in the Snip & Sketch window.
- Use annotation tools and editing options available in the toolbar.
- Click the "Save" or "Share" button to save or share the screenshot.
How To Save Your Screenshot
Once you've captured your screenshot using Snip & Sketch, you can save it easily. Look for the "Save" icon (a floppy disk) in the top left corner of the window. Click here, choose a descriptive name and location, and click "Save."
How To Find Your Screenshot
Finding your saved screenshot is also straightforward. Open File Explorer and navigate to the folder you chose when saving. Alternatively, Snip & Sketch saves captures by default to the "Pictures" folder within a subfolder named "Screenshots." You can access this location directly by opening File Explorer and following the designated path.
Tips And Tricks
How do you take the perfect screenshot on a Dell computer?
Get Ready
Make sure you prepare your screen for the screenshot. Hide the windows you want to hide and close the apps you don’t want on your screenshot. If you’re going to take a screenshot of your desktop, think about the icons. Do you want these to be visible?
If you are taking a screenshot of text, make sure it’s readable. For example, you can use the Ctrl + or Ctrl - shortcuts to adjust the text in your browser or the alternative zoom tools in your other apps.
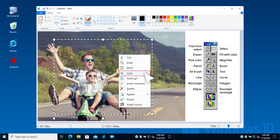
Cropping And Editing Screenshots
After taking a screenshot, you may want to crop or edit the image before sharing it. On a Dell PC, you can use the built-in Paint tool or a third-party photo editing software like Adobe Photoshop.
To crop an image in Paint, open the image in the app and click on the "Select" tool. Click and drag your mouse to select the portion of the image you want to keep, then click "Crop" to remove the rest of the image. You can also use Paint or another photo editing software to add text, arrows, or other annotations to your screenshots.
Taking Screenshots of Specific Windows or Parts of the Screen
Sometimes you may only want to capture a specific window or area of your screen, rather than the entire screen.
The more convenient option is to use a screenshot tool like ScreenRec. All you need to do is press Alt + S and drag your mouse — around the window, around the entire screen, or around the part of the screen you want to capture. You will see the screenshot immediately on your screen. You will be able to copy it to your clipboard, save it as a file, or share it.
The screenshot will also be uploaded to your online Gallery when you can find it at all times, download it, and share it.
Alternatively, on a Dell PC or laptop, you can use the Windows + Shift + S keyboard shortcut to open Snip & Sketch mode. This allows you to capture a specific part of your screen by clicking and dragging your mouse.
Finally, you can use the Alt + Print Screen keyboard shortcut to take a screenshot of the active window only. The downside is that the screenshot will be
Comparison Table Of The Different Methods For Taking A Screenshot On A Dell PC
Method | Shortcut | Features | Ease of Use |
ScreenRec | ScreenRec has just one hotkey to remember. Press Alt + S on any platform and you'll start screen capturing. | Various features including annotation tools, cloud storage, and screen recording | Very easy |
Windows + Print Screen | Windows key + PrtScn | Captures entire screen and saves automatically | Easy |
Snipping Tool | None by default | Allows selection of specific region, basic annotation tools, save in various file formats | Medium |
Snip & Sketch | Windows + Shift + S | Allows selection of specific region, basic annotation tools, save in various file formats | Medium |
Frequently Asked Questions
Yes, you can take a screenshot of a specific window by using a dedicated screenshot app like ScreenRec for easy sharing.
Alternatively, you can press the Alt + Print Screen keyboard shortcut on a Dell Windows laptop.
The easiest thing to do is to use a screenshot app like ScreenRec.
Alternatively, you can search for “Snipping Tool” in your Start menu or press Windows Key + Shift + S to start the default screenshot tool.
The location where your screenshots are saved depends on the tool you used to capture them. If you use the Print Screen key or the Alt + Print Screen shortcut, the screenshots will be copied to the clipboard, and you'll need to paste them into another program to save them. If you used the Snipping Tool or a third-party tool, the screenshots may be saved automatically to a designated folder or to the clipboard.
Yes, if you have a microphone connected to your Dell PC, you can use voice commands to take a screenshot using the Windows Speech Recognition tool. Simply say "take a screenshot" or "capture a screenshot" to capture an image of your screen.
No, there is no limit to how many screenshots you can take on your Dell PC. You can take as many as you need, and they will be saved to your computer's memory or hard drive until you delete them.
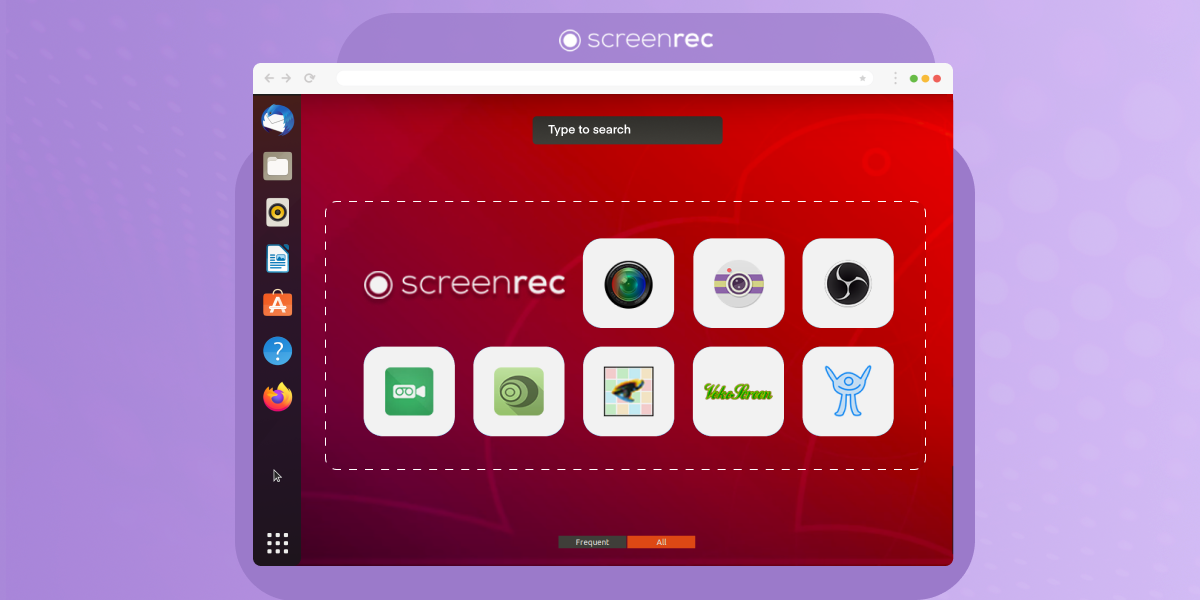
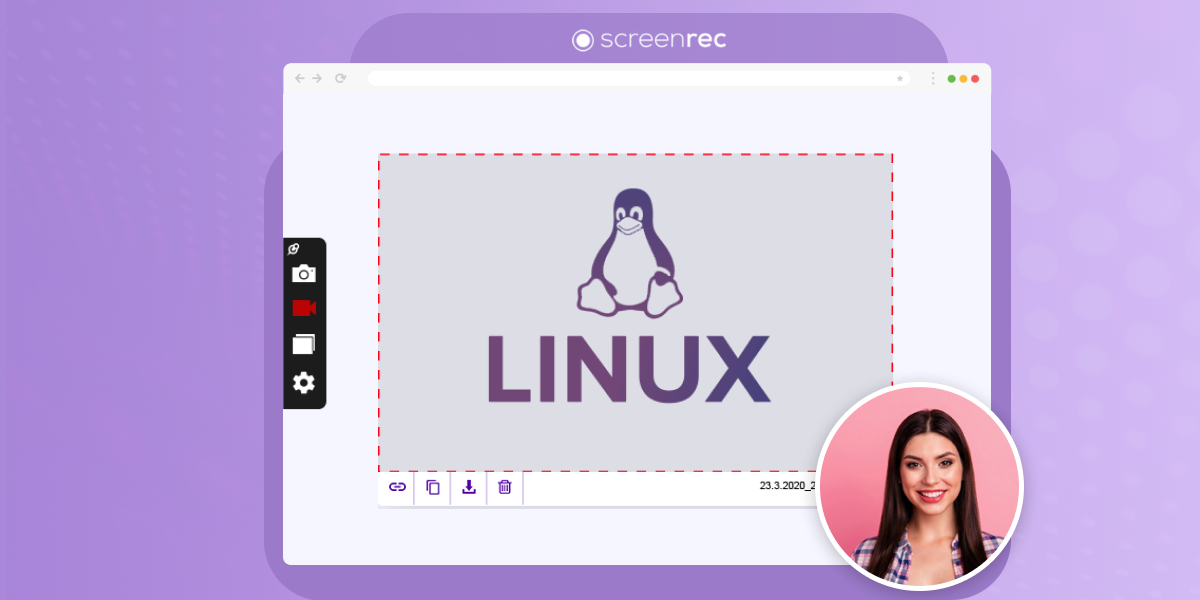
To take a screenshot on a Dell PC running on Linux, you can use the built-in screenshot tool or a third-party Linux screenshot tool like ScreenRec. The keyboard shortcut to take a screenshot may vary depending on the Linux distribution you're using, so it's best to check the documentation or online forums for your specific distribution.
Conclusion
In short, taking screenshots on a Dell PC can be done through several methods. Some of them are ScreenRec, Windows + Print Screen shortcut, Snipping Tool, and Snip & Sketch. Each method has its own advantages and user preference will vary depending on the situation. These methods work both when screenshotting on Dell desktop and laptop computers.
Taking screenshots can be helpful in a variety of scenarios such as at work, educational projects, and technical support requests.
References & Further Reading
- Screenshot Tools For Linux Operating System
- Third-Party Screenshot Tools For You
- Linux Snipping Tools You Should Be Using
- How To Send Screenshots on any OS
- Free Windows 10 Screenshot Tools
- How To Take A Screenshot on Asus PC


DON’T MISS OUT
Get updates on new articles, webinars and other opportunities: