Как Да Записвате Компютърния Си Екран И Аудио
Независимо дали трябва да записвате стрийм на живо или да създадете видео урок за работа, често се нуждаете да записвате компютърния екран и аудио заедно.
Това трябва да е лесно, нали?
Да... Всъщност не.
Когато искате софтуер за запис на екрана със звук, който може наистина да предостави страхотни функции безплатно, е, нека просто кажем, че опциите ви са ограничени. Няма притеснения обаче. Ще разгледам най-добрите БЕЗПЛАТНИ софтуери за запис на екрана на пазара днес. Критериите се базират на способности за заснемане на екрана, възможности за запис на аудио, опции за споделяне и лесота на използване.
Лесното Решение: Използвайте ScreenRec За Да Записвате Екранно Аудио И Видео
Скрит в бъркотията на интернет е Screenrec и може да е най-добрият софтуер за запис на екран и звук за Windows, който сте използвали досега. Лесен е за използване, безплатен и светкавично бърз и работи на Windows 7, Windows 8 и Windows 10. Знам, че това може да звучи като много, така че ще ви покажа. Ето как да записвате екрана си с аудио на Windows. Гледайте това видео:
Или вижте текстовото ръководство по-долу.
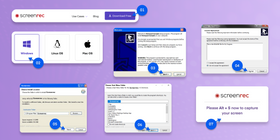
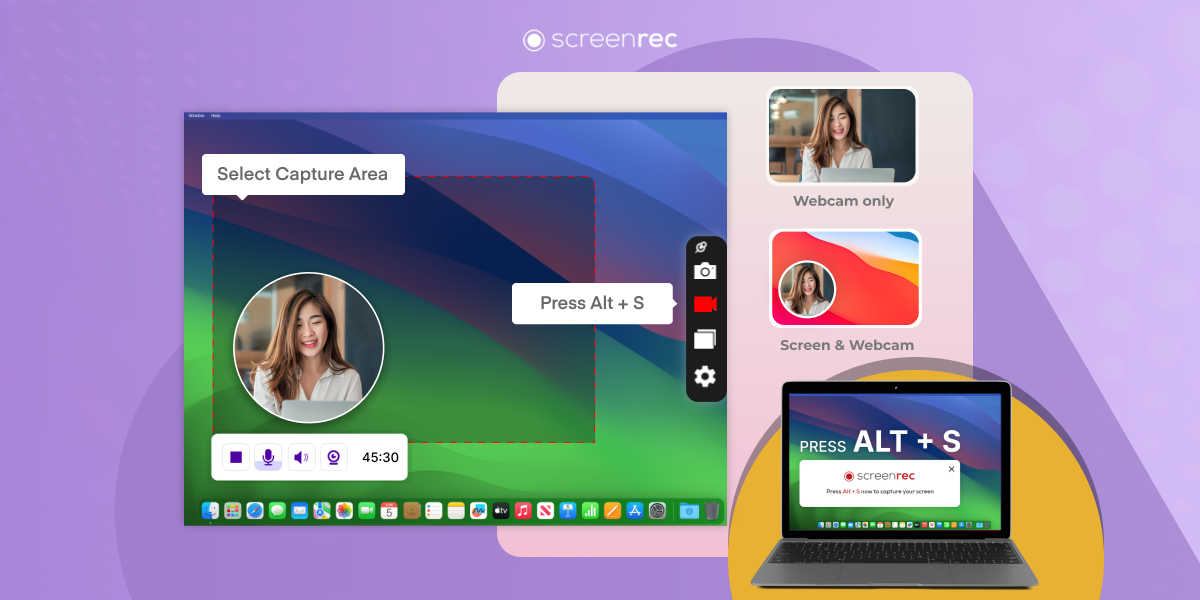
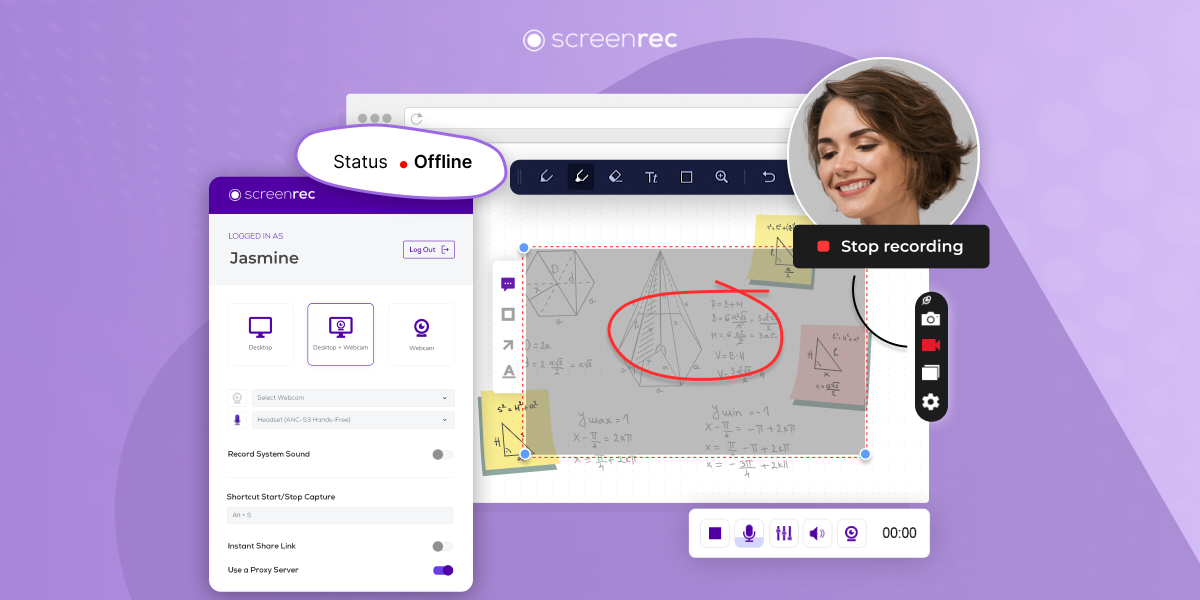
Стъпка 1: Изтеглете и Инсталирайте Screenrec Софтуер За Запис На Екрана За Mac И Windows
Screenrec ще се стартира автоматично след като се инсталира.
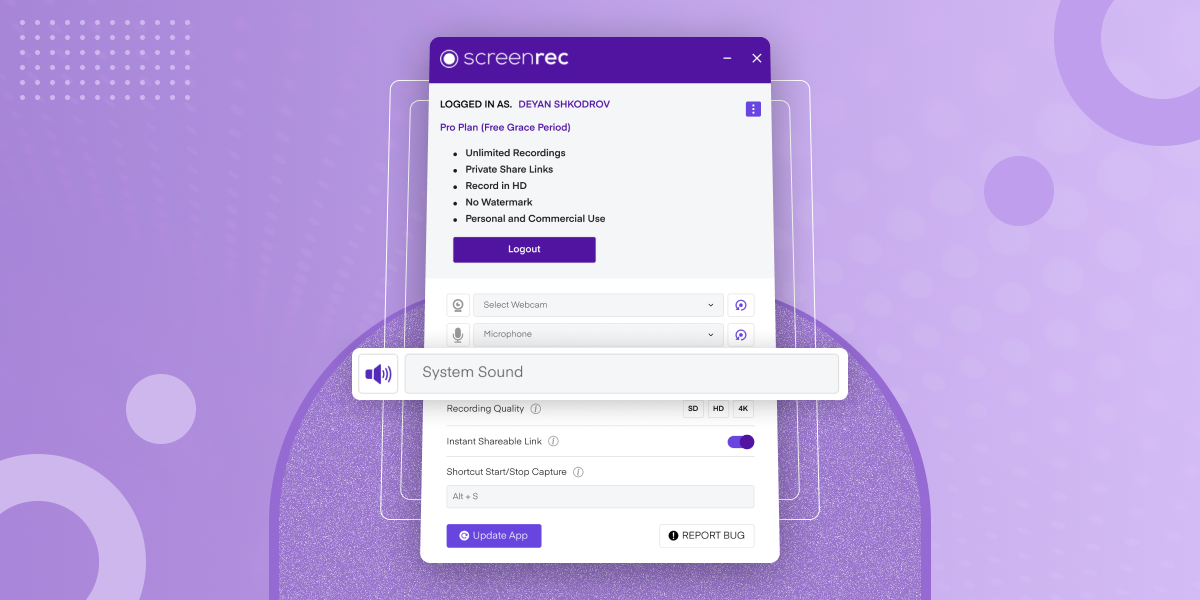
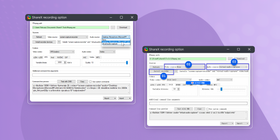
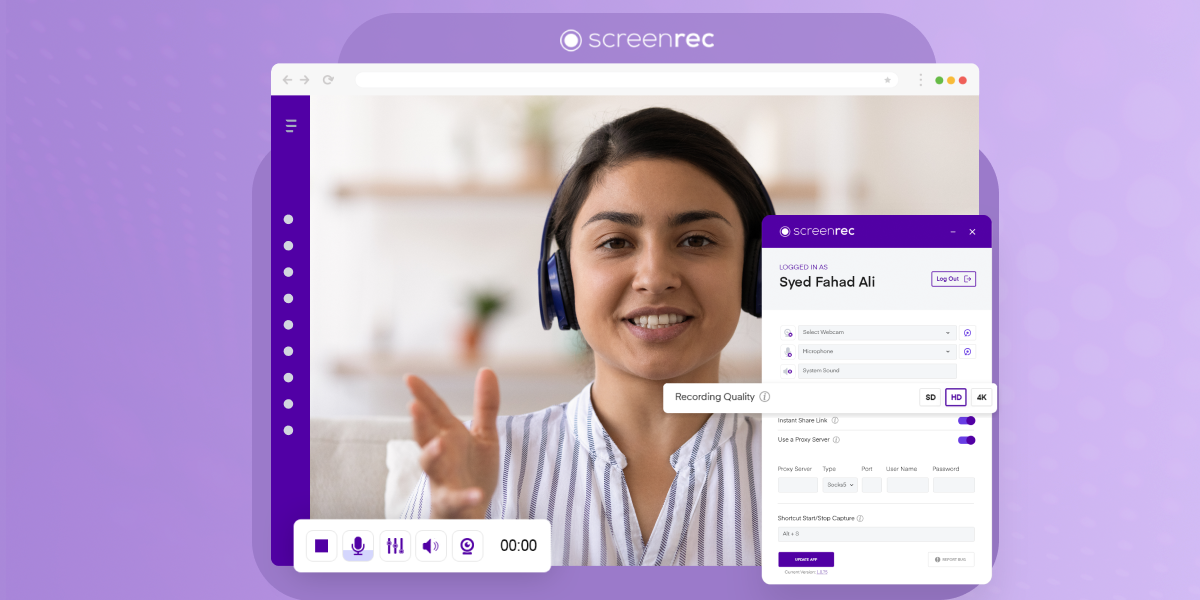
Стъпка 2: Конфигурирайте настройките за запис на аудио
Screenrec може да записва компютърния ви екран СЪС звук, идващ както от микрофона ви, така и/или от компютърното ви аудио. Вярвайте или не, това е голяма работа, тъй като много други инструменти за запис на екрана го правят да изглежда невъзможно.
Микрофонът е избран по подразбиране, за да ви позволи да добавите аудио разказ. За да записвате системно (desktop) аудио, отидете в настройките и включете превключвателя за системен звук.
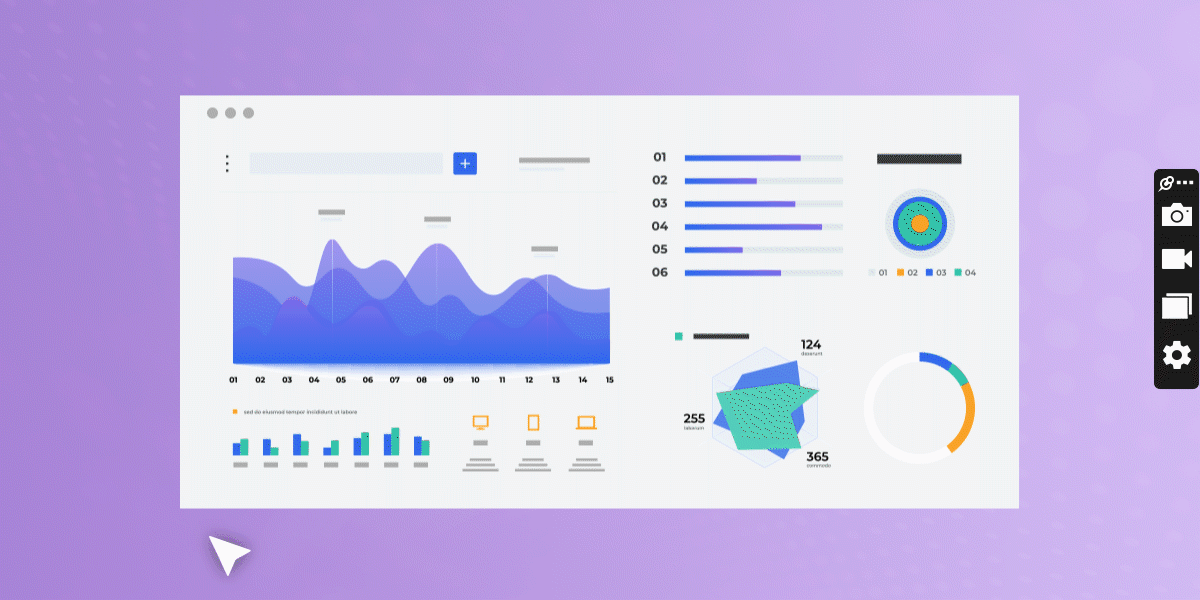
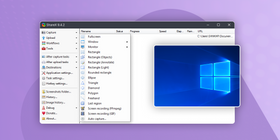
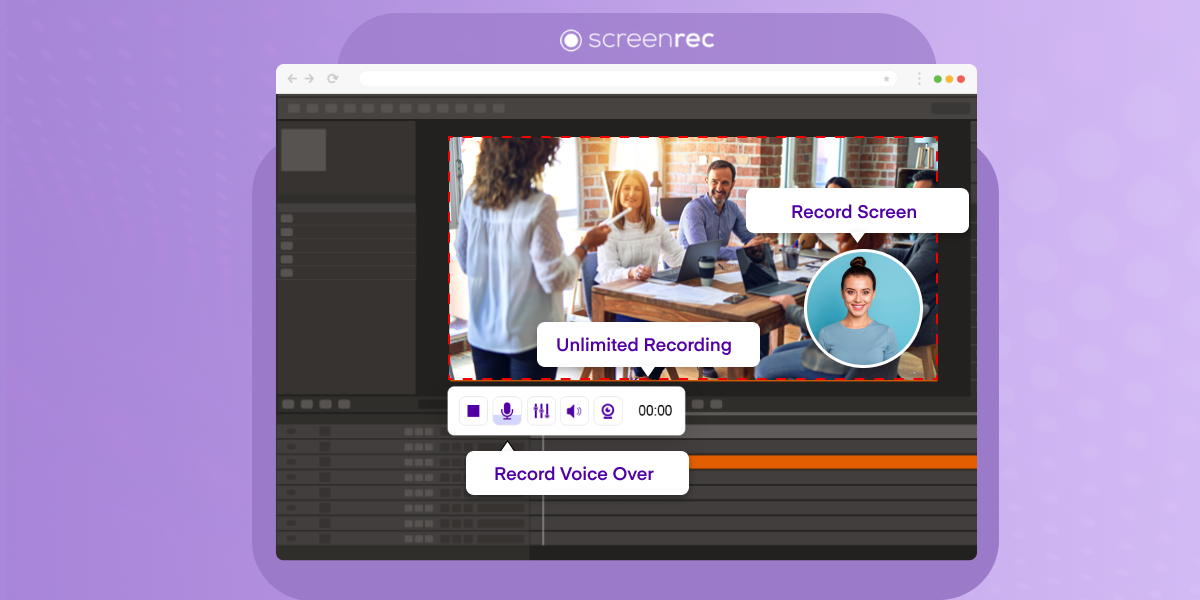
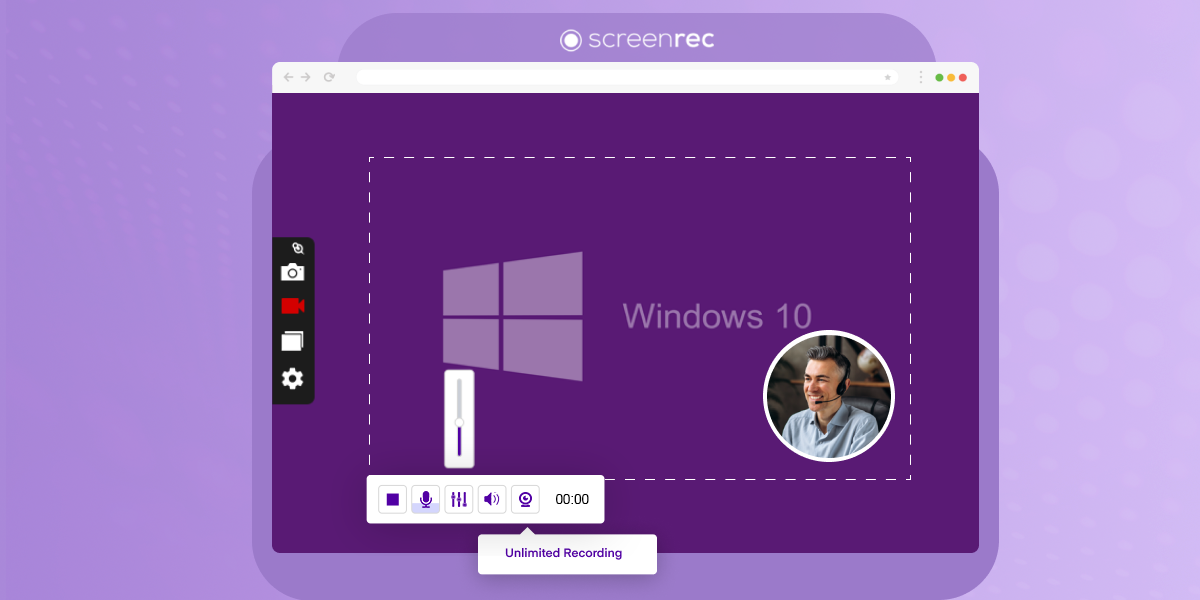
Стъпка 3: Запишете вашето екранно видео
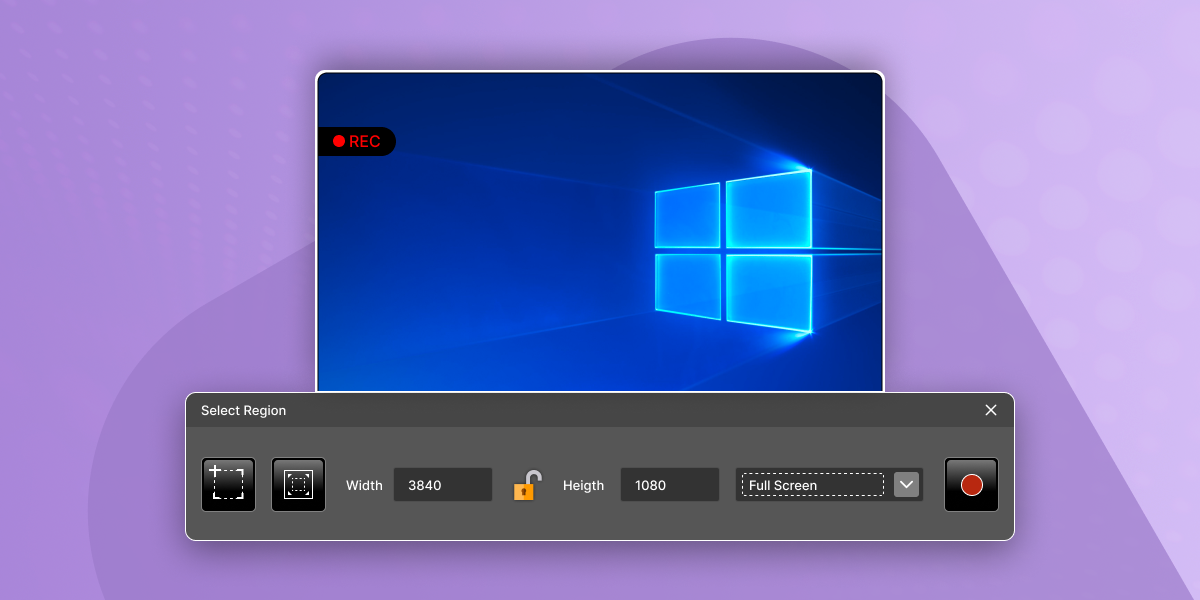
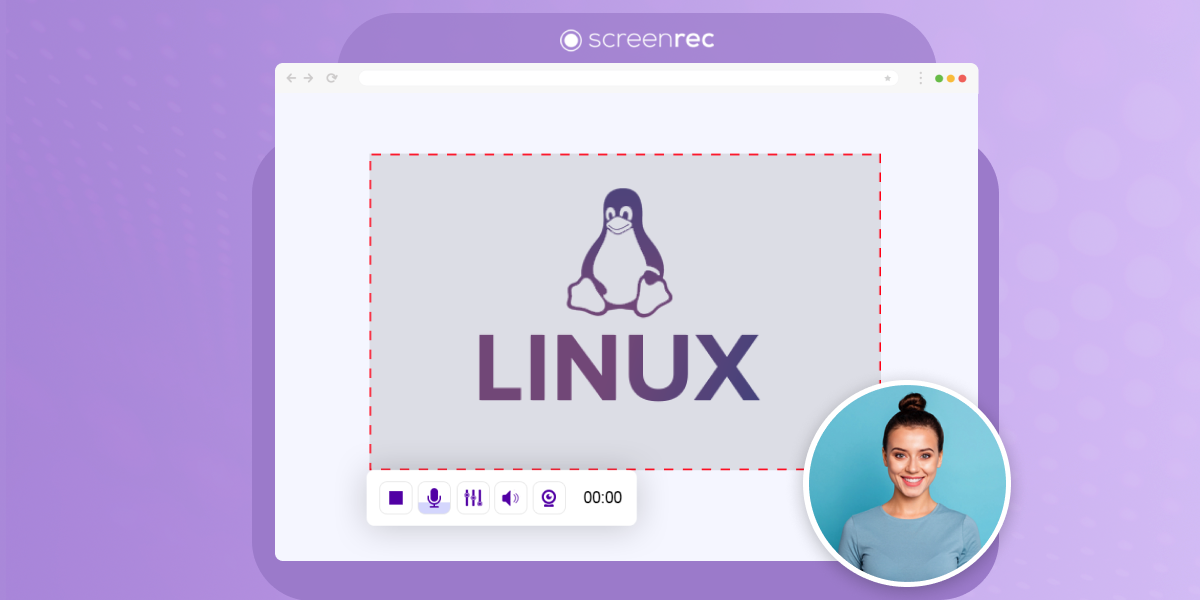
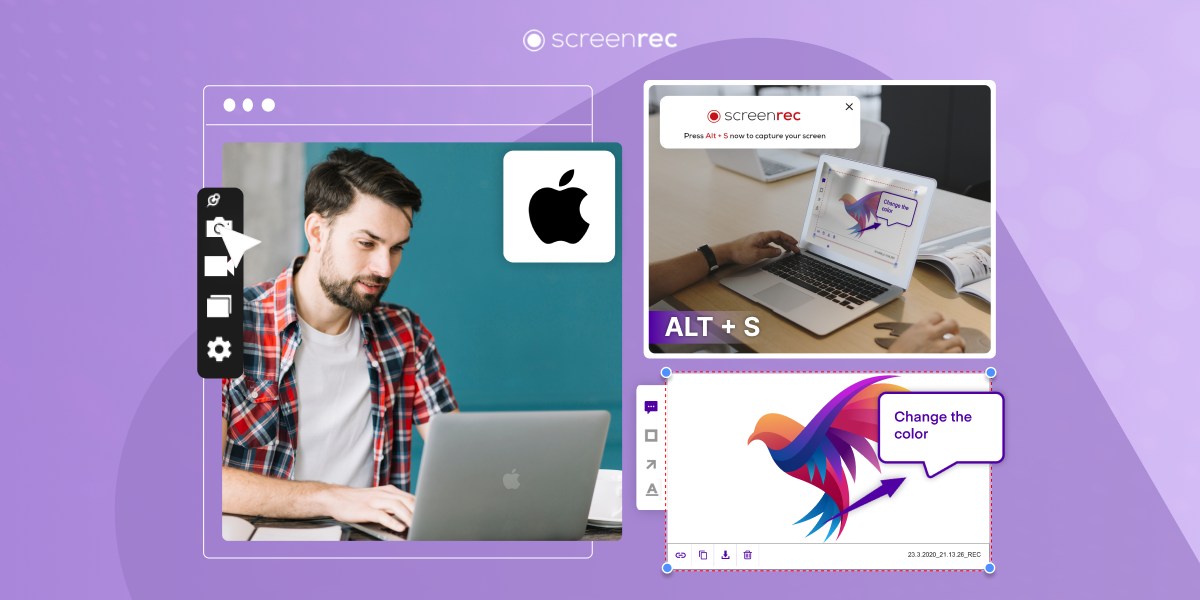
Натиснете Alt-S или кликнете иконата на камерата и след това използвайте мишката си, за да изберете област за заснемане. За заснемане на цял екран, кликнете и плъзнете мишката над целия екран.
След като изберете област за заснемане, записът на екрана (screencast) ще започне автоматично. Ще видите голямо оранжево обратно броене, започващо от 3.
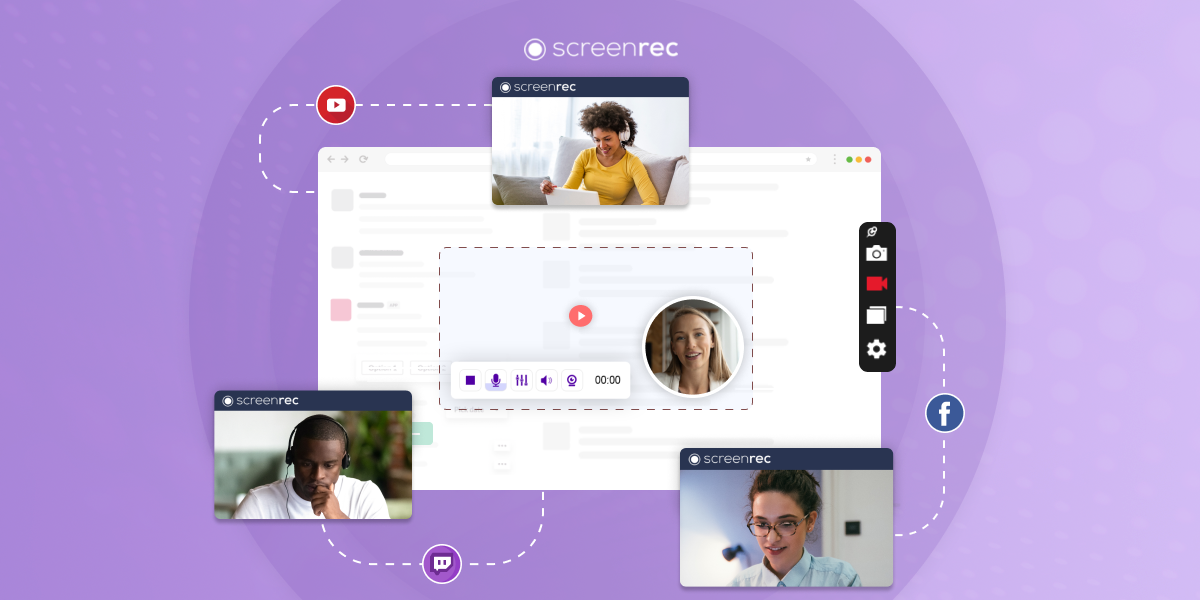
Стъпка 4: Споделяйте записаните си видеа мигновено
Когато приключите със записа на екрана и аудиото, уникален споделим линк се създава автоматично. Ако това е първия път, когато използвате Screenrec, ще бъдете помолени да създадете безплатен акаунт. Можете да поставите уникалния си споделим линк в имейл, приложение за съобщения, директно в социалните медии, както пожелаете. Доста готино, нали?
Screenrec всъщност е единственият безплатен инструмент за запис на екрана на пазара, който ви дава споделим линк мигновено. Възможно е, защото Screenrec качва записа ви на екрана във фонов режим (докато записвате). Така че, ако някога забравите да запазите локално или случайно изтриете видеото си, то вече е онлайн!

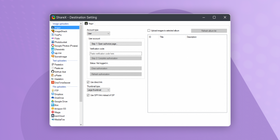
Стъпка 5: Управлявайте записите на екрана в галерията и потребителския панел
Не само се създава автоматично споделим линк, но вашето видео заснемане на екрана се качва директно в облака във високо качество. Кликнете върху иконата на галерията, за да видите съществуващите си записи. Задръжте върху запис, за да го прегледате, да получите споделим линк или да го изтриете.
Лесота на използване
Що се касае до лесотата на използване, Screenrec е толкова прост, че е безумие. Няма сложни бутони или настройки. Не трябва да мислите за кодиране или качване на видеото си. Всичко се прави за вас. Само с няколко кликвания и в рамките на няколко минути можете да записвате екранното си аудио и видео и да го споделяте.
Алтернативни Начини За Заснемане На Екрана Си С Аудио
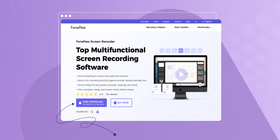
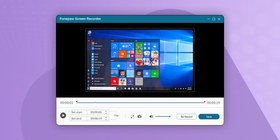
Опция 1: FonePaw Screen Recorder – Лесно За Използване Приложение За Запис
FonePaw Screen Recorder не само свършва работата с записването, но също предоставя добро преживяване при записа на екрана за всички потребители. Софтуерът позволява на потребителите свободно да персонализират записите си. Потребителите могат да регулират областта за записване, размера на уеб камерата си, звука на системата и микрофона и така нататък. Това, което е още по-добре, е че няма воден знак в записаните видеа.
Лесота на използване
FonePaw Screen Recorder е много лесен за използване. Въпреки че има много мощни функции, има сравнително прост интерфейс и можем да кажем, че пада под категорията на лесните софтуерни програми за запис на екрана. Лесно е да се използва, независимо дали сте напреднал потребител или не.
Ето как да записвате компютърния екран и аудио с FonePaw Screen Recorder.
Стъпка 1: Изтеглете и инсталирайте FonePaw Screen Recorder.
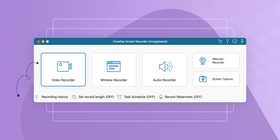
Стъпка 2: Стартирайте програмата. Кликнете върху Video Recorder.
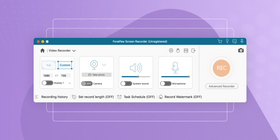
Стъпка 3: Настройте настройките.
Потребителите могат да настройват настройките предварително, включително областта за записване, уеб камерата и звука на системата и микрофона. Можете също така да планирате задачата и продължителността на записването. Кликнете REC за да започнете записването.
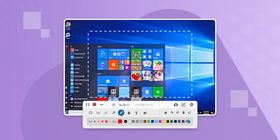
Стъпка 4: Запис.
Докато записвате, можете да заснемате екрана. Кликнете на червената квадратна бутонка за да завършите записването.
Стъпка 5: Преглед и редактиране на вашето видео.
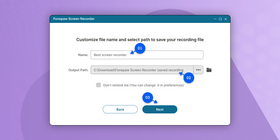
Стъпка 6: Запазете вашето видео.
Въведете името и пътя за изход на видеото. Кликнете на Следващата за да запазите видеото.
Само с няколко кликвания, вашият запис е готов. Можете да го качите на сайт за споделяне на видео или на облачно хранилище, ако искате да го споделите.
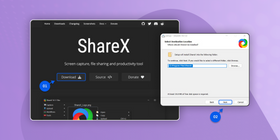
Опция 2: ShareX – инструмент с отворен код, който си върши работата
Ако търсите базов инструмент за запис на екрана, ShareX е добър избор. Семпъл е, лесен за използване и върши работа. Представете си го като „флип телефон“ сред инструментите за запис на екран – издръжлив, надежден и някак все още не остарял, въпреки развитието на технологиите.
Лесота на използване
ShareX е удобен за потребителя най-вече защото има базови функции. Интерфейсът е минималистичен и напомня Windows меню. Това може да е плюс за хората, които не държат на „екстри“. Но малко цвят нямаше да навреди. Нека просто кажем, че не е особено красив.
Ето как да записвате компютърния екран и аудио с ShareX.
Стъпка 1: Изтеглете и инсталирайте ShareX
Стъпка 2: Стартирайте приложението
Стъпка 3: Запис на компютърно аудио и микрофон
Технически с ShareX можете да записвате гласа си и/или компютърното аудио. Не се радвайте прекалено – за да направите видео от екрана с аудио заснемане, трябва да изтеглите допълнителен софтуер, да го инсталирате и да направите промени в настройките.
Все пак можете да правите аудио разказ с микрофона, докато записвате екрана. Ако това ви е нужно – имате късмет.
За запис на микрофон отворете настройките на задачите и намерете секцията за запис на екрана. В опциите за запис изберете микрофона като аудио източник.
За запис на екрана със звук кликнете бутона за инсталиране на рекордера в лявата част на екрана. Ще бъдете подканени да изтеглите и инсталирате допълнителен софтуер. Следвайте инструкциите. След това изберете виртуалния аудио капчър от падащото меню за аудио източник.
Стъпка 4: Изберете област за видео заснемане
Кликнете менюто за заснемане в лявата част на екрана. Изберете желаната област и от падащото меню изберете опцията за запис на екрана, за да заснемете видео.
Стъпка 5: Споделете записите си
Има десетки дестинации за споделяне, които можете да изберете и да качите директно от менюто на ShareX. Единственият минус е, че трябва да изчакате записът да се качи.
Кликнете задачите след качване в лявата част на екрана. Изберете опции за скъсяване, копиране или споделяне на URL. Изберете дестинации, за да качвате директно към социална платформа или сайт.
Стъпка 6: Управлявайте записите си
След заснемане има множество опции в задачите след заснемане. За съжаление, най-добрите опции важат главно за екранни снимки, а не за видео (например ефекти за изображения, редактор на изображения, създаване на водни знаци и т.н.).
Реално с готовото видео можете основно да го споделите. А, и да го изтриете, предполагаме. Така че… две неща!

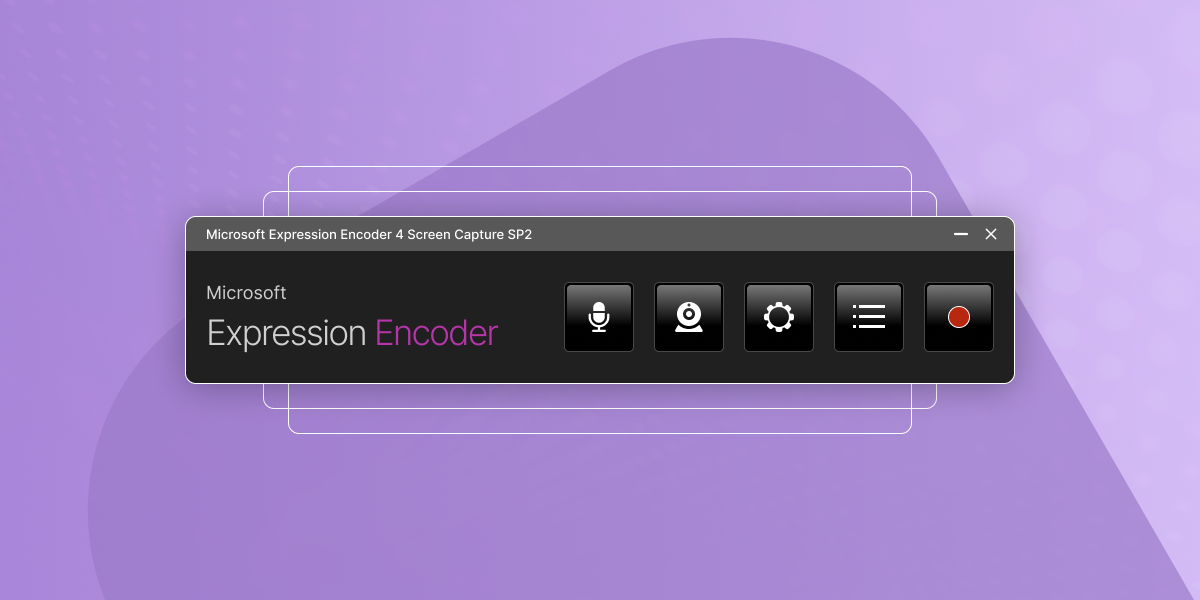
Опция 3: Microsoft Expression Encoder 4 – за напреднали потребители
Microsoft Expression Encoder е популярно решение за запис, което ви дава повече настройки, които може да ви липсват при ShareX. Тези допълнителни опции обаче идват с цена – претрупаност. Има толкова много неща за гледане и разгадаване, че ако не сте „истински техничар“, по-добре още сега потърсете урок в YouTube.
Лесота на използване
Нямам нищо против малко „софистицираност“ в приложенията, но има тънка граница между сложно и прекалено сложно. Microsoft определено я е преминал.
Проблемът с Expression Encoder 4 е, че е тромав. Интерфейсът е като контролен център на космическа совалка – пълен с превключватели, бутони и функции, които трябва да помните. Едно от нещата, които трябва да правите ръчно, е да енкодирате видеото. След като приключите със записа, трябва ръчно да стартирате енкодирането, за да получите финалния файл. Не става автоматично.
С времето вероятно ще свикнете, но ако искате нещо просто и лесно за разбиране – това определено НЕ е то.
Ето как да записвате компютърния екран и аудио с Microsoft Expression Encoder 4.
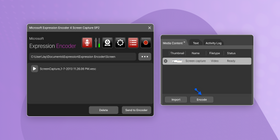
Стъпка 1: Изтеглете и инсталирайте Microsoft Expression Encoder 4
На компютъра ви ще се инсталират две различни програми – Microsoft Expression Encoder 4 и Microsoft Expression Encoder 4 (заснемане на екрана).
Стъпка 2: Стартирайте приложението
Уверете се, че стартирате Microsoft Expression Encoder 4 (заснемане на екрана), а не другата програма. Ще видите лентата за запис.
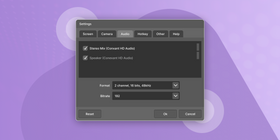
Стъпка 3: Настройте аудио параметрите
Записът на аудио е много по-лесен, отколкото при ShareX. При заснемане на екрана можете да записвате звук от системните високоговорители или от микрофон, без да инсталирате допълнителни компоненти.
Трябва само да изберете правилната аудио опция в таба с настройки и готово – системните звуци се записват.
За запис на аудио от микрофон кликнете иконата за настройки в потребителския панел и включете опцията за микрофон.
За запис на системно аудио следвайте същата процедура, но включете опцията за високоговорители.
Въпреки това…
Ако използвате по-стара система, например Windows XP или Windows 7, можете да забравите за запис на компютърното аудио. Ако има разминаване между аудио изхода на системата и опциите в енкодера, ще получите грешка. С други думи – записът ви ще бъде без звук.
Аз също пробвах да записвам екрана си на Windows 10. С микрофона нямах проблем, но понякога ShareX просто отказваше да заснеме системното аудио без ясна причина. Така че ако имате проблеми – не се притеснявайте. Не е от вас, а от софтуера.
Стъпка 4: Направете заснемане на екрана със звук
Честно казано, въпреки че в началото може да отнеме време да се ориентирате в множеството информация, когато започнете да записвате, всичко е сравнително просто. Функциите пускане/пауза/стоп са лесно достъпни. Можете да маркирате област за запис с мишката или да изберете прозорец/област от падащото меню в панела.
За да започнете запис на видео, отворете опциите за екрана, като кликнете иконата „слънце“. Уверете се, че всичко е настроено както желаете. Изберете областта чрез инструмента за изрязване или като изберете прозорец от падащото меню. След това кликнете иконата за запис, за да започнете.
Стъпка 5: Енкодирайте видеото
Да, тук има допълнителна стъпка – и не е най-забавната. Когато спрете записа, трябва да го изпратите към енкодера, което отваря другата програма Microsoft Expression Encoder. Можете да редактирате записа и да настроите параметрите за енкодиране.
Ако това ви кара да искате да избягате с писък – спокойно. Можете просто да кликнете бутона за енкодиране в долния ляв ъгъл и да приключите.
Стъпка 6: Споделете записа на екрана
Споделянето на видеа може да е досадно. Вместо директни опции за споделяне като при ShareX, трябва ръчно да качите видеото в YouTube, след като го запазите локално.
Няма удобни бутони като „Сподели във Facebook“ или опция от типа „Туитни това!“. 2026 е – всички сме разглезени и очакваме да споделяме мигновено.
Хайде, Microsoft! Включете се в играта! (Без каламбур.)
Заключение
И това е! Вече знаете три начина да записвате компютърния екран и аудио. Но как да изберете правилния инструмент?
Ако търсите безплатен и лесен софтуер за запис на екрана със звук, изберете ScreenRec (само внимавайте да не се „пристрастите“ към мигновеното споделяне). Ако сте свикнали със ShareX и не държите на моментално споделяне, това също може да е добра опция. А ако искате много разширени функции и ви е комфортно да енкодирате и качвате записите ръчно, MS Expression Encoder може да е правилният избор.
Често задавани въпроси
Стъпка 1: Изтеглете и инсталирайте ScreenRec – софтуер за запис на екрана за Mac и Windows
Стъпка 2: Натиснете Alt + S, изберете областта за заснемане и активирайте аудио превключвателя, за да включите запис на системния звук
Стъпка 3: Кликнете видео камерата, за да започнете запис
Нужен ви е инструмент за запис на екрана, който може да записва системно аудио. Не всички програми за заснемане/запис на екрана предлагат тази функция, затова проверете предварително дали я има.
Източници и допълнително четене
- Microsoft Expression Encoder 4 – урок и разбор
- Microsoft Expression Encoder 4: безплатна версия срещу Pro
- ScreenRec: за този инструмент за запис на екрана
- Запис на екрана за бизнес
- ShareX – пълен урок
- ShareX – допълнителният аудио софтуер, който инсталирах: „виртуален аудио капчър“
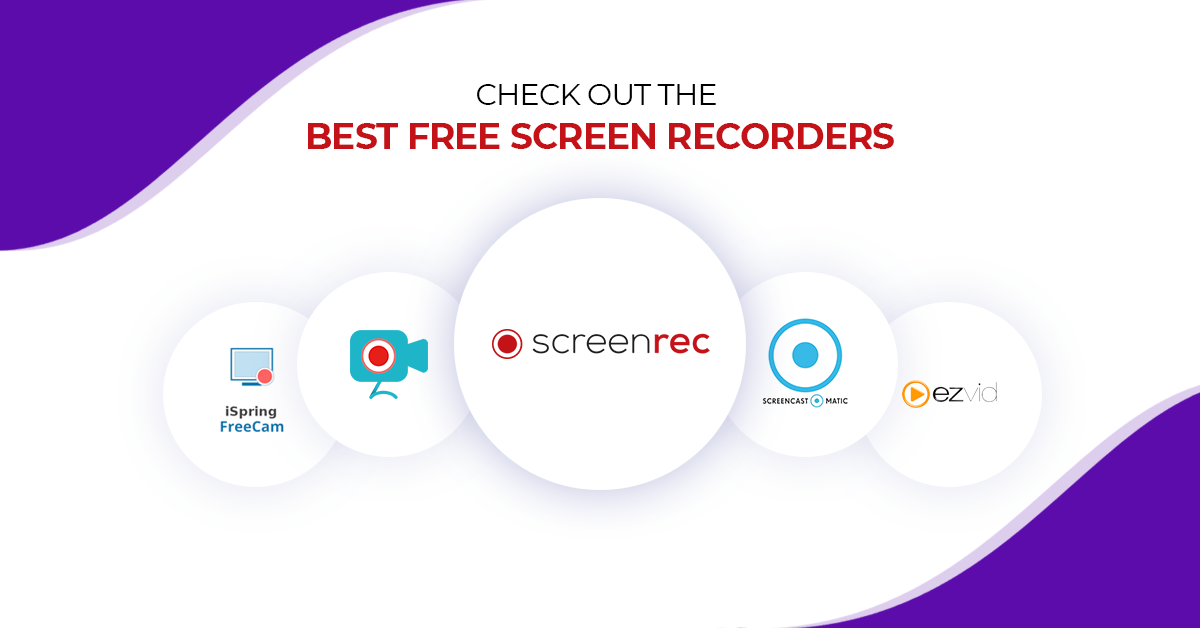
- Топ 5 най-добри безплатни софтуера за запис на екрана (и как да изберете)
- Как да записвате екрана си на Windows 10


![⏰Най-добри 8 Софтуера За Запис На Екрана Без Закъснение [Сравнение]](https://screenrec.com/assets_dist/screenrec/media/no-lag-screen-recorder/no-lag-screen-recorder-comparison.png)
![8 Най-Добри Безплатни Софтуера За Запис На Екрана Без Воден Знак [Актуал. 2026]](https://screenrec.com/assets_dist/screenrec/media/screen-recorder-no-watermark/screen-recorder-no-watermark.png)
НЕ ПРОПУСКАЙТЕ
Получавайте новини за нови статии, уебинари и други възможности: